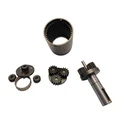
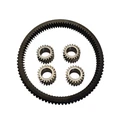
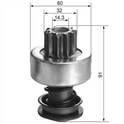
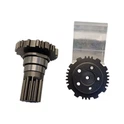
Yo, fellow mechanics and DIY enthusiasts! If you're into working on engines, you've probably come across a worn-out part in a self-starter Bendix at some point. Well, you're in the right place because I'm a supplier of self-starter Bendix parts, and I'm gonna walk you through how to replace a worn-out part in a self-starter Bendix.
First off, let's talk a bit about what a self-starter Bendix is. It's a crucial component in the starting system of an engine. When you turn the ignition key, the Bendix gear engages with the flywheel ring gear, allowing the starter motor to crank the engine. Over time, due to constant use and wear and tear, parts of the Bendix can start to wear out, which can lead to starting problems.
Tools You'll Need
Before you jump into replacing the worn-out part, you'll need to gather some tools. Here's a list of the basic tools you'll likely need:
- Socket set: You'll need various socket sizes to remove bolts holding the starter and Bendix in place.
- Screwdriver set: Both flathead and Phillips head screwdrivers will come in handy for removing any small screws.
- Pliers: For gripping and pulling out smaller components.
- Grease: To lubricate the new part once you install it.
Identifying the Worn-Out Part
The first step in replacing a worn-out part is to figure out what's actually faulty. Here are some common signs of a worn-out Bendix part:
- Grinding noise when starting the engine: This could indicate that the Bendix gear teeth are worn out.
- The engine doesn't crank: If the Bendix isn't engaging properly with the flywheel, it could be due to a problem with the overrunning clutch or other internal components.
Once you've identified that there's an issue with the Bendix, it's time to take it apart and see which specific part needs replacing.
Removing the Self Starter Bendix
To get to the Bendix and replace the worn-out part, you'll first need to remove the self starter from the engine. Here's how you do it:
- Disconnect the battery: This is a safety measure to prevent any electrical shocks while you're working. Locate the negative terminal on the battery and use a wrench to loosen the nut, then remove the cable.
- Locate the starter: The starter is usually mounted on the engine block, near the flywheel. It's a large, cylindrical component with electrical connections.
- Remove the electrical connections: There are typically two electrical connections on the starter - a large main cable and a smaller control wire. Use a wrench to loosen the nuts on the main cable terminals and remove them. Then, gently pull the control wire off the starter solenoid.
- Remove the mounting bolts: Use your socket set to remove the bolts that hold the starter to the engine block. There are usually two or three bolts. Keep the bolts in a safe place so you don't lose them.
- Take out the starter: Once the bolts are removed, carefully pull the starter out of the engine.
Disassembling the Self Starter Bendix
Now that you've got the starter out, it's time to disassemble the Bendix. Here's a general process:


- Remove the retaining ring: There's usually a retaining ring that holds the Bendix in place. Use a pair of pliers to carefully remove the ring.
- Slide out the Bendix: Once the retaining ring is removed, you should be able to slide the Bendix out of the starter housing.
- Inspect the parts: Take a close look at all the components of the Bendix, including the gear, overrunning clutch, and shaft. Look for signs of wear, such as chipped teeth, excessive play, or damage.
Replacing the Worn-Out Part
Once you've identified the worn-out part, it's time to replace it. You can find high-quality replacement parts from various suppliers. For example, you can check out Prestolite Starter Bendix, Starter Bendix Drive, or DB Electrical Starter Drive.
Here's how you replace the part:
- Clean the components: Before installing the new part, use a clean cloth or a parts cleaner to clean all the components of the Bendix and the starter housing. This will ensure that there's no debris or dirt that could cause problems later.
- Install the new part: Carefully insert the new part into the Bendix assembly. Make sure it fits properly and aligns with the other components. If it's a gear, make sure the teeth mesh correctly.
- Reassemble the Bendix: Once the new part is installed, carefully reassemble the Bendix. Slide it back into the starter housing and replace the retaining ring.
Reinstalling the Self Starter
Now that the Bendix is back together, it's time to reinstall the starter. Here's how:
- Position the starter: Carefully place the starter back in its original position on the engine block, aligning the mounting holes.
- Install the mounting bolts: Use your socket set to tighten the bolts that hold the starter to the engine block. Make sure they're tightened securely but don't over-tighten them.
- Reconnect the electrical connections: Reattach the main cable and the control wire to the starter. Tighten the nuts on the main cable terminals with a wrench.
- Reconnect the battery: Reattach the negative cable to the battery terminal and tighten the nut.
Testing the Starter
Once everything is back in place, it's time to test the starter. Turn the ignition key and see if the engine cranks smoothly. If it does, great! You've successfully replaced the worn-out part in the self-starter Bendix. If not, double-check all your connections and make sure the new part is installed correctly.
Why Choose Us as Your Supplier
As a self-starter Bendix supplier, we've got a wide range of high-quality parts at competitive prices. We understand the importance of having reliable components for your engines, and we're committed to providing you with the best products. Whether you need a simple gear replacement or a complete Bendix assembly, we've got you covered.
If you're interested in our products or want to discuss your specific needs, don't hesitate to reach out. We're here to help you keep your engines running smoothly.
References
- Automobile Mechanics Textbooks
- Online Automotive Repair Guides