


As a Bendix Starter Drive supplier with over 15 years in the automotive component manufacturing space, I've seen firsthand how even the smallest installation misalignment can turn a routine starter replacement into a costly, time-consuming repair. The starter drive bolts-seemingly straightforward fasteners-hold the critical [Starter Bendix Drive Clutch] that connects the starter motor to the engine's flywheel, transferring torque reliably every time you turn the key. Misaligned bolts here don't just cause a rough start; they can wear down the drive gear prematurely, jam the starter mid-cycle, or even damage the flywheel teeth. Today, I'm breaking down the step-by-step process our team uses at our facility to ensure perfect alignment every time-tips that we share with our distribution partners, independent mechanics, and do-it-yourselfers alike who rely on our [Bendix Starter Drive] line, including our precision-engineered [Drive ASM] and [Accurate Starter Drives] for replacement applications.
First, let's ground this in why alignment matters so much for Bendix systems specifically. Unlike traditional overrunning clutches, Bendix-style drives use a helical spline on the starter shaft to engage the flywheel, so the bolts that secure the drive to the starter housing must sit perfectly perpendicular to both the drive's mounting flange and the starter's mounting face. Even a 0.005-inch tilt on one bolt can throw off the entire drive's axis, leading to uneven load distribution during engagement. I remember a call from a fleet maintenance manager two years ago-his team was installing our [Automotive Replacement Starter Drives] on 20 delivery trucks, and three had to be pulled back because the starter wouldn't disengage. It turned out his techs had torqued the bolts in a random order, twisting the drive housing just enough to bind the clutch. That's when we doubled down on refining our installation protocols, because we know our customers depend on Bendix drives to deliver consistent performance, not just fit.

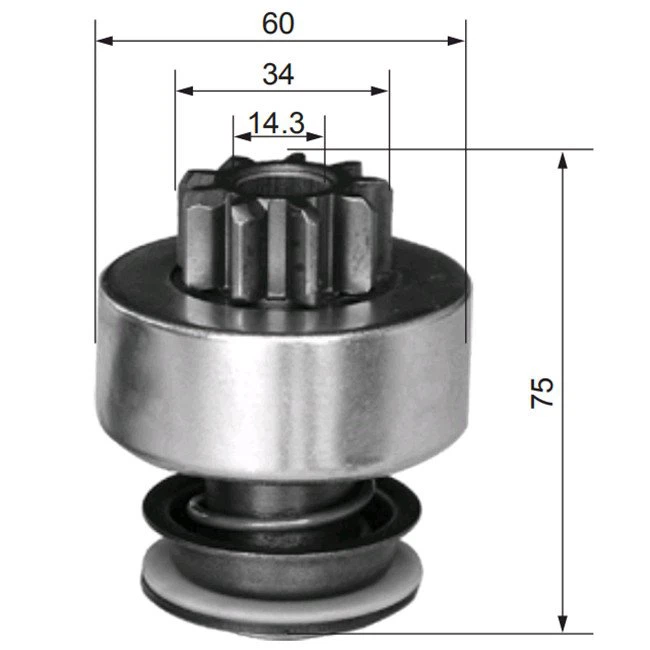
Let's start with pre-installation preparation, because alignment begins long before you pick up a wrench. The first rule we teach our partners is to inspect both the starter housing and the [Bendix Starter Drive] itself for any debris or burrs. A tiny metal shard left in a bolt hole can force a bolt to sit crookedly, even if you think you've tightened it correctly. Wipe the starter's mounting flange with a lint-free cloth and some isopropyl alcohol, and run a clean tap through each of the bolt holes to remove any thread crud-this ensures each bolt seats fully, without binding. Next, check the drive's mounting flange: if there's a scratch or a bent lip, it's easy to mistake that for alignment issue, or to have the drive sit at an angle when you bolt it on. Our team also recommends matching the correct drive to your application-our [Drive ASM] line is designed for specific starter models, so using a drive rated for your motor's horsepower and flywheel size eliminates fit issues that mimic misalignment. That's why we always advise customers to reference their vehicle's VIN when ordering replacement drives, to make sure they get the right fit the first time.
Now, the actual bolt installation process-this is where most alignment mistakes happen, and where our process differs from generic fastener guidance. First, hand-thread all the bolts before using any tools. I can't stress this enough: starting each bolt with a few turns by hand lets you feel if it's cross-threaded or binding. If a bolt doesn't turn smoothly after two or three rotations, don't force it-pull it out, check for debris, and try again. For Bendix drives, there are usually three or four mounting bolts, depending on the model, and each one has a specific torque specification (usually between 8 and 12 ft-lbs, but always check the packaging or the drive's spec sheet). But torque order is just as important as torque value. Never tighten bolts in a circle or a random pattern-use a crisscross (or star) sequence, like you would for a car wheel. Here's the exact step-by-step for a four-bolt Bendix drive: hand-thread all four bolts until they're snug (no more than 1 ft-lb of torque), then tighten bolt 1 to 5 ft-lbs, followed by bolt 3, then bolt 2, then bolt 4. Once all are at 5 ft-lbs, repeat the sequence to reach the final torque. This incremental, crisscross method ensures the mounting flange is pulled evenly against the starter housing, preventing tilting or warping of the [Starter Bendix Drive Clutch] components that would throw off alignment.
Another critical step is checking the drive's axial play and alignment after torquing. Even if you followed the sequence, a warped starter housing or a slight defect in the drive can cause misalignment. Our team uses a simple dial indicator for quality checks at our facility, but for on-the-go mechanics or DIYers, a more accessible method works too: insert a feeler gauge between the drive's outer gear teeth and a fixed point (like the edge of the starter housing) at four equally spaced points around the gear. If the gap varies by more than 0.003 inches, you have alignment issues. Don't assume this is normal-this variation means the drive is sitting at an angle, which will cause uneven wear on the flywheel teeth and the drive's internal clutch. If you notice this, loosen all the bolts, re-inspect the holes and flange, and re-torque using the crisscross sequence. In rare cases, a faulty drive flange is the culprit, so replacing it with a genuine [Bendix Starter Drive] or [Accurate Starter Drive] part eliminates that variable-after all, counterfeit parts often have imprecise machining that causes fit and alignment problems, even if they look identical.
We also recommend checking the drive's spline engagement before completing installation. The Bendix drive's helical spline is what lets the gear slide forward to mesh with the flywheel, so if the drive is misaligned, it can't extend fully, leading to a partial mesh that causes grinding. After torquing the bolts, gently push the drive gear forward by hand (most drives will move ¼ to ½ inch when free). If it doesn't slide smoothly, or if it binds halfway, that's a sign of misalignment or damaged splines. Pull the gear back, inspect the splines on both the drive and the starter shaft for dirt or burrs, and try again. If it still binds, double-check that the mounting bolts are tight and aligned-this binding is almost always due to a tilted drive flange, not a faulty spline, so adjusting the bolts will fix it.
One common mistake I see is using the wrong type of bolt or washer. Bendix starter drive bolts are usually Grade 5 or Grade 8, with a flat washer and sometimes a lock washer to prevent vibration from loosening. Using a cheap, non-rated bolt can stretch or bend during torquing, leading to misalignment over time. Our technicians always use the washers that come with the drive-these are precision-sized to ensure the bolt seats flat against the mounting flange, not at an angle. If you lose the original washers, use flat washers that match the bolt's diameter and thickness, and avoid using lock washers that are too thick, as they can lift the drive flange and cause tilt.
For our fleet and distribution partners, we also do a post-installation test: spin the flywheel by hand (with the starter disconnected from the battery) and listen for any grinding or uneven resistance. If the flywheel turns smoothly, without any rough spots, the drive is properly aligned. If you hear grinding, that's the gear teeth not meshing evenly, which means the drive is tilted. It's a quick check that saves you from a breakdown on the road, and it's something we train all our sales partners to share with their customers.
Let's talk about common misalignment culprits to watch for, even when you think you followed all steps. First, a corroded starter housing: rust or scale on the mounting face can create a gap between the starter and the drive, making it impossible to get a flat seat for the drive flange. We recommend lightly sanding the mounting face with 220-grit sandpaper if there's minor corrosion, as long as you don't remove too much material-too much sanding can throw off the housing's alignment. Second, a bent starter shaft: if the shaft that holds the Bendix drive is bent, no amount of bolt tightening will fix alignment. You can check this by holding a straight edge against the shaft and spinning it-any wobble means a bent shaft, which needs to be replaced before installing a new drive. Third, over-torquing bolts: even if you follow the sequence, cranking bolts beyond the specified torque can warp the drive's flange, leading to misalignment. We use torque wrenches calibrated monthly at our facility, and we advise our customers to do the same-an over-torqued bolt is just as bad as an under-torqued one.
As a supplier, we stand behind our [Bendix Starter Drive] line, including our [Automotive Replacement Starter Drives] and [Drive ASM] products, because we engineer each component to strict tolerance standards. But even the best parts can fail if installed incorrectly, which is why we make these installation guides available for free on our website. We've also started hosting quarterly webinars for mechanics and fleet teams, walking through alignment checks in real time, because we know that proper installation is half the battle for reliable starter performance.
If you're working on a vehicle and run into alignment issues, or if you need to confirm you have the right [Bendix Starter Drive] for your application, our team is here to help. We don't just sell parts-we provide support to make sure our customers get the most out of their components. Whether you're a one-person shop or a large fleet, we can help you select the right drive, walk through installation steps, and answer any questions about alignment.
When it comes to Bendix starter drive bolt alignment, the key is patience and attention to small details: hand-thread all bolts, use a crisscross torque sequence, inspect for debris and defects, and test alignment after torquing. Skipping any of these steps can lead to premature wear, breakdowns, and extra work. At our facility, every [Accurate Starter Drive] we ship is aligned and tested before leaving our warehouse, but we know that on-site installation is where the magic happens-so sharing these tips is how we ensure our customers get the consistent, reliable performance they trust from Bendix drives.


