Hey there, fellow gearheads and DIY enthusiasts! I'm stoked to share some hands - on knowledge about installing a 9 Tooth Starter Drive. As a supplier of these awesome components, I've seen firsthand how a well - installed starter drive can breathe new life into your engine. So, let's roll up our sleeves and get down to business!
What's a 9 Tooth Starter Drive?
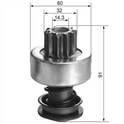
Before we jump into the installation process, let's quickly cover what a 9 Tooth Starter Drive is. It's a crucial part of your vehicle's starting system. The "9 Tooth" refers to the number of teeth on the drive gear. This gear meshes with the flywheel or flexplate of your engine, allowing the starter motor to crank the engine over and get it running.
There are different types of starter drives out there. You might have heard of the Starter Motor Drive, the Bendix Starter Drive, and the DB Electrical Starter Drive. Each has its own unique features, but the 9 Tooth Starter Drive is a popular choice for many vehicles due to its compatibility and performance.
Tools You'll Need
Installing a 9 Tooth Starter Drive isn't rocket science, but you'll need the right tools. Here's a quick list:
- Socket set: You'll need various socket sizes to remove and install bolts.
- Wrenches: Both open - end and adjustable wrenches can come in handy.
- Pliers: For gripping and pulling small components.
- Screwdrivers: Phillips and flat - head for any screws you might encounter.
- A clean workspace: This helps keep everything organized and makes the job easier.
Pre - installation Checks
Before you start taking things apart, it's a good idea to do a few checks. First, make sure your vehicle's battery is fully charged. A weak battery can cause issues during the starting process and might even make you think there's a problem with the starter drive when it's just a battery issue.
Next, visually inspect the area around the starter motor. Look for any signs of damage, corrosion, or loose connections. If you see any corrosion on the battery terminals or starter connections, clean them with a wire brush.
Removing the Old Starter Drive
Now, let's get to the actual removal process. Here are the steps:
- Disconnect the battery: This is crucial for your safety. Start by removing the negative terminal first, then the positive terminal.
- Locate the starter motor: It's usually mounted on the engine block, near the transmission.
- Remove the electrical connections: There are usually two main connections on the starter motor - the large battery cable and a smaller control wire. Use a wrench or socket to loosen the nuts and remove the cables. Be careful not to let the cables touch each other or any metal parts of the vehicle.
- Remove the mounting bolts: Use your socket set to remove the bolts that hold the starter motor in place. There are usually two or three bolts. Keep these bolts in a safe place, as you'll need them later.
- Take out the starter motor: Once the bolts are removed, carefully pull the starter motor away from the engine block. You might need to wiggle it a bit to get it free.
- Remove the old starter drive: On the end of the starter motor shaft, you'll find the old starter drive. It might be held on with a retaining clip or a nut. Use pliers or a socket to remove the retaining clip or nut, and then slide the old drive off the shaft.
Installing the New 9 Tooth Starter Drive
Now that you've removed the old starter drive, it's time to install the new one.
- Clean the starter motor shaft: Use a clean cloth to wipe away any dirt or debris from the shaft. This ensures a smooth fit for the new starter drive.
- Lubricate the shaft and drive: Apply a small amount of grease to the starter motor shaft and the inside of the new 9 Tooth Starter Drive. This helps with the installation and reduces friction during operation.
- Slide the new drive onto the shaft: Make sure it fits snugly and is properly aligned. If there's a retaining clip or nut, install it now to secure the drive in place.
- Re - install the starter motor: Carefully place the starter motor back onto the engine block. Line up the holes for the mounting bolts and insert the bolts. Tighten them with your socket set, but don't over - tighten.
- Re - connect the electrical connections: Attach the large battery cable and the smaller control wire to the starter motor. Tighten the nuts securely.
- Re - connect the battery: First, attach the positive terminal, then the negative terminal.
Testing the New Starter Drive
Once everything is installed, it's time to test the new starter drive. Turn the ignition key to the "Start" position. You should hear the starter motor engage and the engine start cranking. If the engine starts smoothly, congratulations! You've successfully installed the 9 Tooth Starter Drive.
If the engine doesn't start or you hear any strange noises, don't panic. Double - check all your connections to make sure they're secure. It could also be a problem with the battery or another part of the starting system.


Troubleshooting Tips
If you run into issues during the installation or testing process, here are some common problems and solutions:
- Starter motor doesn't engage: Check the battery connections to make sure they're tight. Also, check the control wire to ensure it's properly connected. If the battery is weak, charge it or replace it.
- Strange noises: This could be a sign of a misaligned starter drive or a problem with the gear mesh. Try removing the starter motor and checking the alignment of the drive. You might need to adjust it slightly.
- Engine cranks slowly: This could be due to a weak battery, a problem with the starter motor itself, or a high - resistance connection. Check the battery and clean any corroded connections.
Why Choose Our 9 Tooth Starter Drive
As a supplier, I can tell you that our 9 Tooth Starter Drive is top - notch. We source high - quality materials and use strict quality control measures to ensure that each drive meets the highest standards. Our drives are designed to be durable, reliable, and compatible with a wide range of vehicles.
Whether you're a professional mechanic or a DIY enthusiast, our 9 Tooth Starter Drive is a great choice. It's easy to install, and it'll get your engine running smoothly in no time.
Get in Touch for Procurement
If you're interested in purchasing our 9 Tooth Starter Drive or have any questions about the installation process, we'd love to hear from you. We offer competitive prices, fast shipping, and excellent customer service. Just reach out to us, and we'll be happy to assist you with your procurement needs.
References
- "Automotive Electrical Systems" - A comprehensive guide to vehicle electrical components, including starter drives.
- "How to Rebuild Your Car's Starter Motor" - A practical handbook with step - by - step instructions for starter motor repairs and installations.