Installing a Standard Bendix Drive is a task that requires the right set of tools and a good understanding of the process. As a reputable supplier of Standard Bendix Drives, I've had the privilege of assisting numerous customers in their installation endeavors. In this blog post, I'll delve into the essential tools needed for installing a Standard Bendix Drive and provide some insights to make the process smoother.
Understanding the Standard Bendix Drive
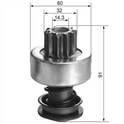
Before we jump into the tools, let's briefly understand what a Standard Bendix Drive is. A Bendix drive is a crucial component in a vehicle's starting system. It is responsible for engaging the starter motor with the engine's flywheel when the ignition key is turned. This allows the starter motor to crank the engine and start the vehicle. The Bendix Drive Assembly is designed to disengage automatically once the engine starts, preventing the starter motor from over - speeding.
Essential Tools for Installation
1. Socket Set
A comprehensive socket set is a must - have for installing a Standard Bendix Drive. You'll need different sizes of sockets to remove and install various bolts and nuts. Typically, you'll encounter bolts of different diameters, so having a set that ranges from small to large sizes is essential. For example, you might need a 10mm or 12mm socket to remove the bolts holding the starter motor in place. Make sure your socket set includes both metric and standard sizes, as different vehicles may use different measurement systems.
2. Wrenches
In addition to a socket set, a set of wrenches is also necessary. Open - end wrenches and adjustable wrenches can be used in situations where a socket cannot reach or when you need to apply additional torque. An adjustable wrench can be particularly useful when you're dealing with non - standard sized bolts or nuts. You can adjust it to fit the specific size of the fastener you're working on.
3. Screwdrivers
Screwdrivers come in handy for removing and installing screws that hold the starter motor cover or other components in place. You'll need both flat - head and Phillips - head screwdrivers of different sizes. A small Phillips - head screwdriver might be required to remove the screws on the electrical connections of the starter motor, while a larger flat - head screwdriver could be used to pry open certain parts if necessary.
4. Pliers
Pliers are versatile tools that can be used in multiple ways during the installation process. Needle - nose pliers can be used to grip and manipulate small wires or components. They are especially useful when dealing with electrical connections. You can use them to bend wires into the right position or to remove small clips. Slip - joint pliers, on the other hand, can be used to hold larger objects or to apply more force when needed.


5. Torque Wrench
A torque wrench is an important tool to ensure that all bolts are tightened to the correct specifications. Over - tightening or under - tightening bolts can lead to problems such as leaks, vibrations, or even component failure. When installing a Standard Bendix Drive, you'll need to torque the bolts holding the starter motor and the Bendix drive itself to the manufacturer's recommended values. This helps to ensure a secure and proper installation.
6. Wire Cutters and Strippers
If you need to replace or modify any electrical wires during the installation, wire cutters and strippers are essential. Wire cutters are used to cut wires to the appropriate length, while wire strippers are used to remove the insulation from the ends of the wires. This allows for proper electrical connections to be made between the starter motor, the Bendix drive, and the vehicle's electrical system.
7. Safety Equipment
Safety should always be a top priority when working on a vehicle. You'll need safety glasses to protect your eyes from debris, especially when removing or installing components. Gloves are also recommended to protect your hands from sharp edges, hot surfaces, or chemicals. Additionally, if you're working under the vehicle, a jack stand is necessary to support the vehicle safely and prevent it from falling.
Step - by - Step Installation Process
Step 1: Disconnect the Battery
Before starting any work on the starter motor or the Bendix drive, it's crucial to disconnect the negative terminal of the vehicle's battery. This prevents any electrical shocks or short - circuits during the installation process.
Step 2: Remove the Starter Motor
Use your socket set and wrenches to remove the bolts holding the starter motor in place. Carefully disconnect the electrical connections from the starter motor, using your screwdrivers and pliers. Once all the connections are detached, remove the starter motor from the vehicle.
Step 3: Remove the Old Bendix Drive
If the old Bendix drive is still attached to the starter motor, use the appropriate tools to remove it. This may involve removing a retaining ring or a set of screws. Be careful not to damage any of the components during this process.
Step 4: Install the New Bendix Drive
Take the new Standard Bendix Drive and carefully install it onto the starter motor. Make sure it is properly aligned and secured. Use the torque wrench to tighten any bolts or nuts to the correct specifications.
Step 5: Re - install the Starter Motor
Place the starter motor back into its original position in the vehicle. Re - attach the electrical connections, making sure they are secure. Use your socket set and wrenches to tighten the bolts holding the starter motor in place.
Step 6: Reconnect the Battery
Once the installation is complete, reconnect the negative terminal of the vehicle's battery. Test the starter motor to ensure that the Bendix drive is working properly. Turn the ignition key and listen for the sound of the starter motor engaging with the engine's flywheel.
Tips for a Successful Installation
- Read the Manual: Always refer to the vehicle's service manual or the manufacturer's instructions for the specific installation process of the Bendix drive. This will provide you with detailed information and torque specifications.
- Inspect the Components: Before installing the new Bendix drive, inspect it for any damage or defects. Also, check the starter motor and other related components for wear and tear.
- Clean the Components: Make sure to clean the surfaces of the starter motor and the area where the Bendix drive will be installed. This helps to ensure a proper fit and reduces the risk of contamination.
Conclusion
Installing a Standard Bendix Drive requires a combination of the right tools, knowledge, and careful attention to detail. By having the essential tools such as a socket set, wrenches, screwdrivers, pliers, torque wrench, wire cutters and strippers, and safety equipment, you can ensure a successful installation.
If you're in the market for a high - quality Standard Bendix Drive, look no further. As a trusted supplier of Starter Drives, we offer a wide range of products that are designed to meet the highest standards of quality and performance. Whether you're a professional mechanic or a DIY enthusiast, our team is ready to assist you with your purchasing needs. Contact us today to discuss your requirements and let's work together to get your vehicle up and running smoothly.
References
- Various automotive service manuals for different vehicle makes and models.
- Manufacturer's documentation for Standard Bendix Drives.