At Wuxi Superhuman Gear Cold Extrusion Co., Ltd., we know that dealing with a faulty Bendix drive in a starter motor can be frustrating. Whether you're a professional mechanic or a DIY enthusiast, replacing a Bendix drive can seem intimidating. But with the right tools, some patience, and a step-by-step guide, you can replace the Bendix drive efficiently.
Here's a detailed guide on how to replace a Bendix drive, including essential tools, tips, and common mistakes to avoid.
Tools You'll Need for Replacing the Bendix Drive
Before diving into the steps, gather the following tools:
- Socket wrench set
- Ratchet wrench
- Screwdrivers
- Torque wrench
- Pry bar or flathead screwdriver
- Protective gloves
Tip: If you're working with a particularly tight space, it's helpful to have an extension bar for your socket wrench.
Step-by-Step Process for Replacing the Bendix Drive
Step 1: Disconnect the Battery
Before starting any work on the vehicle, always ensure the battery is disconnected to avoid any accidental electrical mishaps. Disconnect the negative terminal of the battery first, followed by the positive terminal.
Step 2: Remove the Starter Motor
Locate the starter motor in your vehicle. The location varies by vehicle model, but typically it's found near the engine or transmission.
Use the socket wrench to remove the mounting bolts securing the starter motor in place.
Disconnect the electrical connections to the starter. This often includes a main power wire and a signal wire.
Carefully remove the starter motor from its mounting position. In some cases, it may require a little prying or wiggling to dislodge it.
Tip: Make sure to note how the starter motor is mounted so you can install the new Bendix drive in the same orientation.
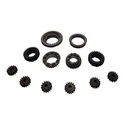
Step 3: Remove the Old Bendix Drive
Once the starter motor is removed, you'll have easy access to the Bendix drive. Here's what to do:
Remove the pinion gear: The Bendix drive is typically secured to the starter motor's shaft by a small retaining nut or clip. Use the correct size socket or pliers to remove it.
Pull out the Bendix drive: With the retaining nut removed, the Bendix drive should slide off the starter motor shaft easily.
Tip: Keep track of how the old Bendix drive is positioned on the shaft. The new one needs to go back on in the same orientation.
Step 4: Inspect the Starter Motor
Before installing the new Bendix drive, it's a good idea to inspect the starter motor for any damage or wear:
- Check the pinion gear and shaft for signs of excessive wear.
- Inspect the solenoid for smooth operation.
- Ensure the shaft is free from debris or damage.
- If the starter motor is in good condition, proceed